GMK pleasantly surprised their customers recently when they released a firmware upgrade for the NucBox device making it compatible with Windows 11. I covered this device in my previous post, which didn’t have a TPM chip at the time. It did have an fTPM that Windows did not recognize. However, after the BIOS upgrade from GMK, NucBox comes with a TPM device. Pure sorcery. In this post, we will look at the upgrade process and compare the system configuration before and after the upgrade.
Where is the TPM?
The device doesn’t have a physical TPM device. I reached out to GMK support for clarification and received the following response:
The TPM2.0 of our device is built in the CPU, but it was not turned on before. When win11 was released, we discovered this problem and opened it in time to solve it.
GMK NucBox comes with the Intel Celeron J4125 CPU which doesn’t have a TPM device according to the spec sheet. If it did, it would have been supported as a TPM or PTT. Having said that, Celeron J4125 does support Intel SGX which provides secure enclaves. Looking at the specification of a TPM device on the Windows Security Processor details page, we see INTC as the manufacturer.
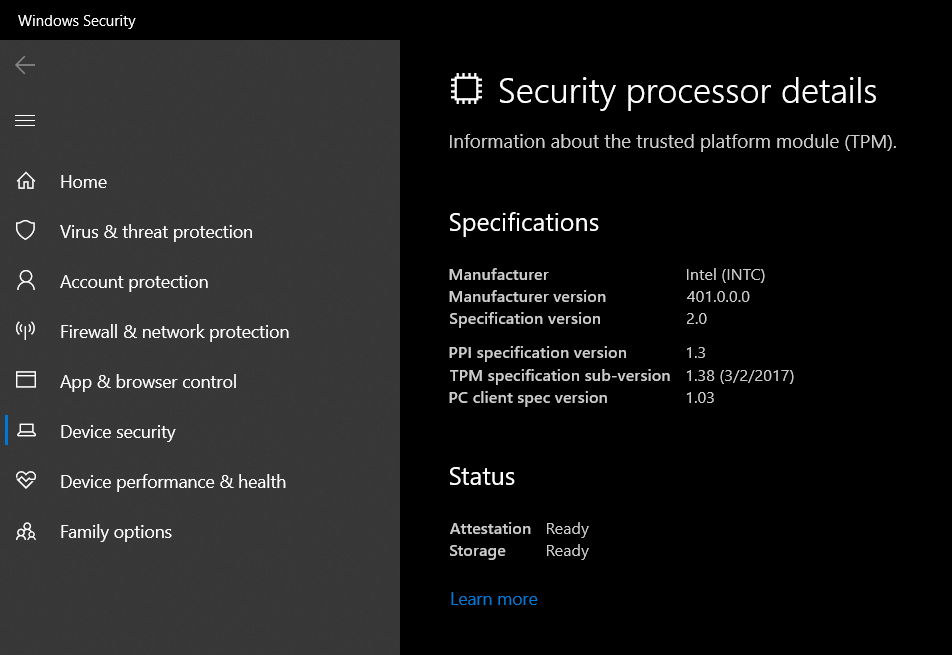
My best guess is that GMK is implementing an fTPM specification using Intel SGX. That’s the sorcery that made TPM appear out of thin air after the upgrade.
Since GMK NucBox doesn’t have a discrete TPM device, it is not as secure as Windows may make us believe. From the Microsoft whitepaper, paragraph 13.1 – Intel SGX and Its Shortcomings:
- Lack of trusted storage makes secrets susceptible to rollback attacks (mening bad guys can turn off prortection and expose the secrets)
- Does not have a secure counter
- No secure clock (to enforce lock-out and protect against a dictionary attack)
- Side-channel attacks are possible
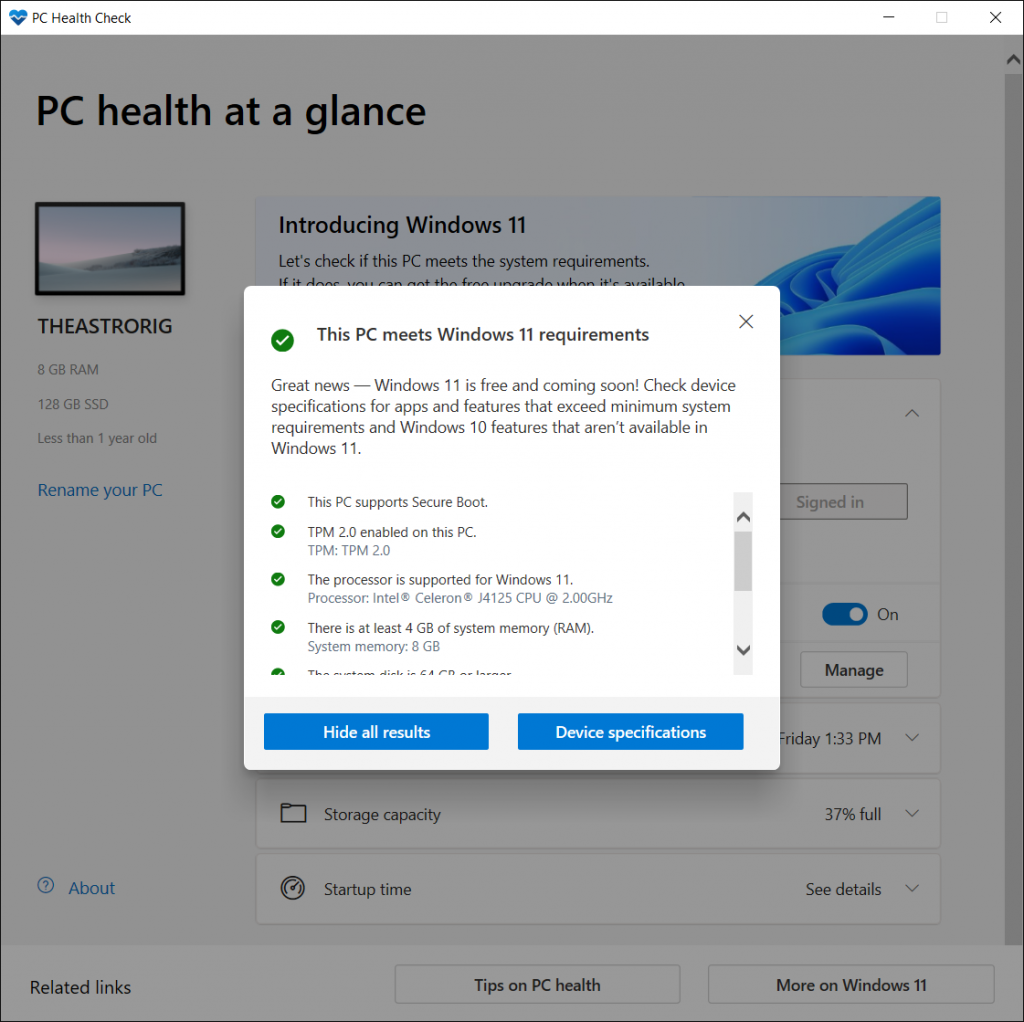
It will meet Windows 11 upgrade requirements and provide a secure boot. However, I would not store sensitive documents on the GMK NucBox device, even when it is encrypted by the Bitlocker backed by TPM.
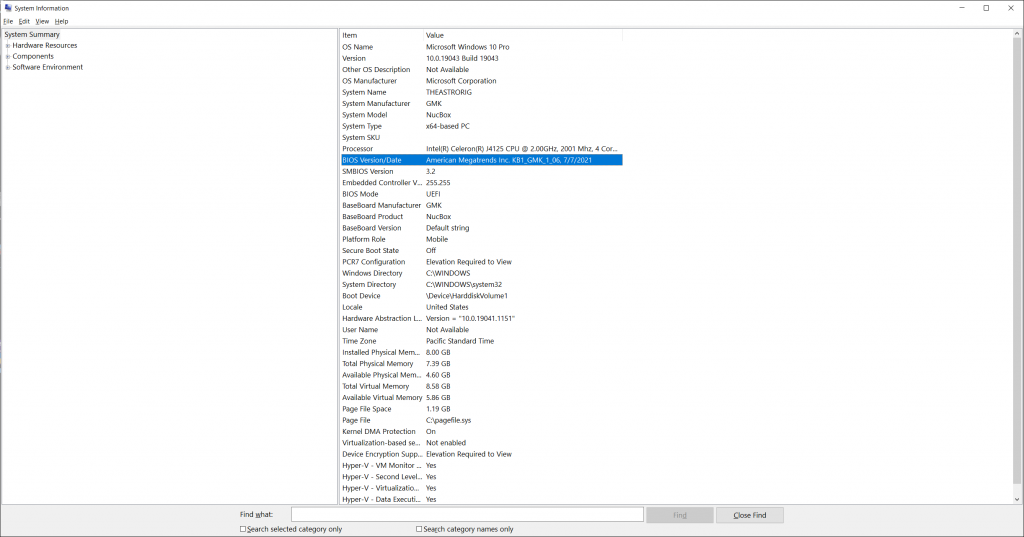
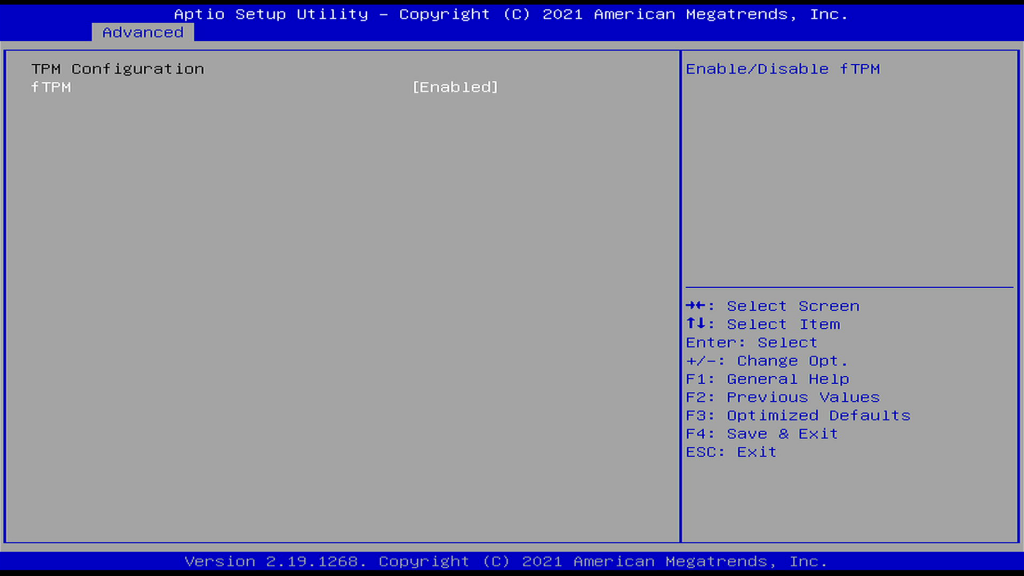
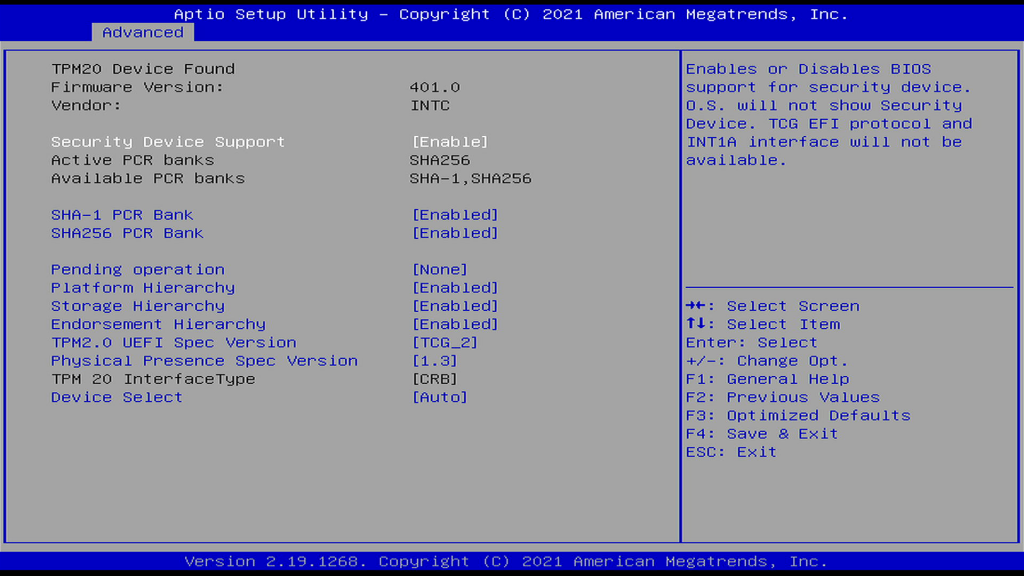
BIOS
It is always useful to inspect BIOS pages and see how the TPM device looks after the upgrade. For comparison, I provided two screenshots of the same page – before and after the upgrade.
Upgrade process
GMK designed the process for fairly technical folks. Unfortunately, it is not wrapped up in a nice shiny application with a big green button that checks all the requirements and carefully executes the upgrade. In this paragraph, I will walk you through the process step by step to give you that boost of confidence you’ve come here for.
GMK files I downloaded were clean from viruses or malware. Any time you download an executable from the internet it is a good idea to scan it with the VirusTotal.
Contrary to what you may discover in GMK upgrade documentation, you do not need access to internal device components.
Check your NucBox
According to GMK upgrade instructions, you need to flip your device around and look at the serial number:
- If your device has “SN” followed by a bunch of numbers – you need this file.
- If your device does not have “SN” on the back – go ahead and download this file.
Download key backup tool
This tool is used to back up your unique computer key from the BIOS before the upgrade and re-apply it after. Download the tool in this file.
Download upgrade instructions
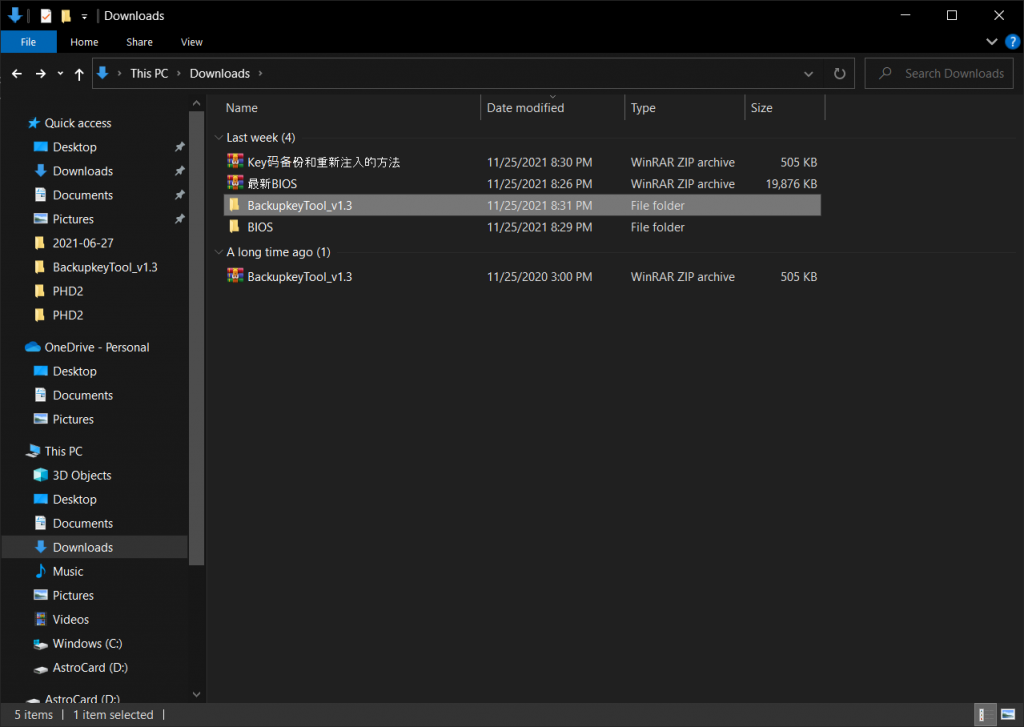
GMK provided upgrade instructions with the screenshots in this file. It is a good idea to have it open as a reference guide. If you’ve downloaded all the files and unpacked them you should see something like the picture below in your folder.
It is a good idea to remove all Chinese characters from the folder names just in case your English locale changes the behavior of any of the system API that upgrade tools rely on.
Upgrade
The process is straightforward but can be nerve-wracking if something goes wrong, like a power outage.
- First go to BackupkeyTool_v1.3 folder and run ConvertOA3_v3.exe file. It will ask for administrator permissions – grant them. This tool will run quickly, read the key from the BIOS and write it into OA3.bin file.
- Next go to BIOS folder right-click on F.bat and Run as Administrator. This tool will actually upgrade the BIOS. It will take a minute or so to do the upgrade, writing one block at a time. Do not interrupt the upgrade or you will brick your device.
- After the upgrade, reboot GMK Nucbox. The first boot will take approximately ~45 seconds to show GMK logo. It is normal so no need to panic.
- Once you boot into Windows after the upgrade, go back to BackupkeyTool_v1.3 folder, make sure OA3.bin file is still there and run FlashTool_x64_v3.exe. It will request administrator permissions – grant them.
- It would be a good idea to reboot your device one more time after key flashing.
After a successful upgrade, you should see a new version in the System Information tool – 7/7/2021.